|
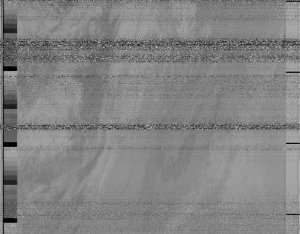
Our apartment was
in the center of Stockholm. The antenna was mounted
on our balcony and connected by a cable running through
the window to a laptop running on our kitchen table!
Unfortunately,
the "field of view" to the sky was very limited
by the buildings surrounding our courtyard. Combined
with the bad weather of winter and the short days, the
images from home were dark and short (see one above).
However, this first
setup was still a lot of fun, especially when I first
managed to hear the 'tick-tock' sound of the NOAA satellite
AM signal.
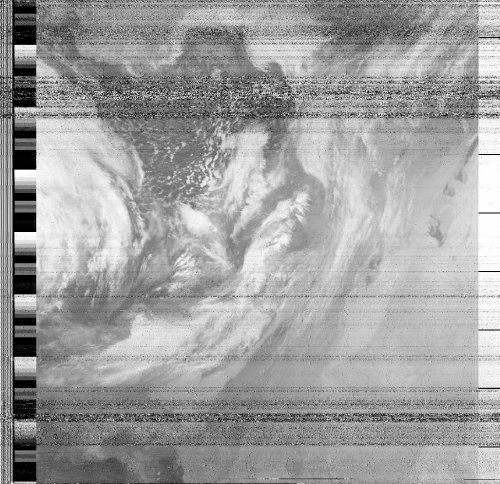
When the same system
was set up at the institute with the antenna on top
of the building we obtained much better pictures. (See
example above.)
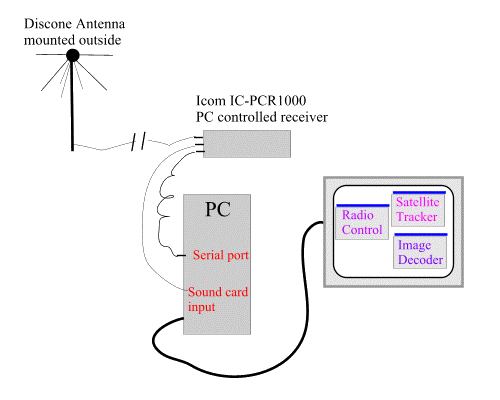
Setup:
a basic system as show above consists of the following:
- Antenna
- for the apartment we used a discone, which
is useful for a wide range of signals but crossed
dipole or QFH (quadrifilar helix) are normally
recommended for APT reception. These cost as low as
$50-100 range.
- Receiver
- a typical consumer shortwave scanner will not work
well for APT satellite reception. The IF (Intermediate
Frequency) bandwidth is either too wide or too narrow.
(Ideally, it is 42Khz.) So we purchased an Icom
IC-PCR1000 [Update Nov.1.08: Icom now offers the
PCR1500 in place of the PCR1000.] receiver that is
controlled from a PC via a serial port connection.
Its IF bandwidth can be set as desired from the control
program.
- PC
with sound card - the PC controls the receiver
and uses the sound card to decode the image signal
from the receiver's audio output.
- Software:
- Radio
control - the PCR1000 comes with a
control program but we more often used RadioCom
3.0 (now available in version 5.0), which
has many features useful for all kinds of shortwave
scanning. (RadioCom
screen image)
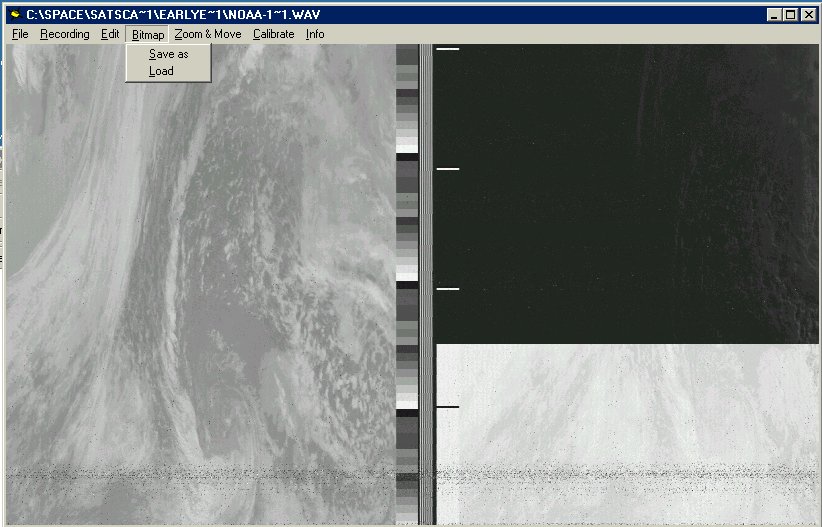
- Image
decoder
- the audio from the receiver must be decoded
to obtain the weather sat image. We used the freeware
WXSAT
progam in this setup. It can run directly from
the sound card or from a WAV file. (WXSAT
screen image)
- Satellite
tracker - the NOAA polar satellites
crosses overhead about twice during the day. (Areas,
like Sweden, near the poles can see them more
often.) Currently two of the NOAA satellites are
active (NOAA-14 & NOAA-15). So one must know
when the pass will occur and how high in the sky
it will be above the horizon. Therefore, a tracking
program is needed. There are a number of such
programs, both freeware and for purchase, with
a varying range of features. Here we used the
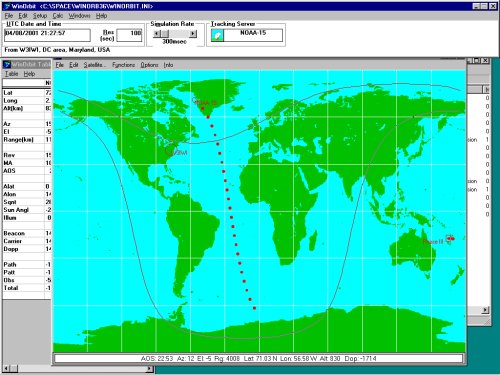
WinOrbit
freeware program. .(WinOrbit
screen image)
Procedure
- the essential steps to get an image:
- Track
the satellites with WinOrbit to find when NOAA-14
or NOAA-15 would come into view and how high in elevation
it would rise.
- Tune
the receiver with RadioCom to the right frequency
(137.620MHz for NOAA-14, 137.500MHz for NOAA-15) in
the FM mode and 50KHz IF.
- Listen
for the "tick-tock" sound of the satellite
signal.
- Record
the audio to a WAV file with RadioCom, starting
as soon as you first hear the satellite's signal.
(The decoder can also work in real-time but its safer
to record to a file and do the decoding later since
I might want to try different settings.)
- Decode
the WAV file with WXSAT. Save the image to
a bitmap file. (Note: we had to play with the parameter
setup in WXSAT to decode the image successfully.)
- Image
processsing, e.g. cropping the visible or IR images,
with a graphics program such as Photoshop.
As I continue to
emphasize, the above components and procedures can be
varied considerably from the approach given above. See
the WeatherSat section
of the top Space Radio page for links to other equipment
and software options.
|


